Ever wondered what it takes to create a challenge in RoboCo?
I’m Alan, a game designer working on RoboCo, and I’ll take you through the steps of creating a challenge. I’ll be using an existing one as an example to guide us… in fact, I’ll use one that no one outside our team has had the chance to play yet. The Saw Log Challenge!
Step 1 – Defining a Challenge
The levels that make up RoboCo are called challenges. That’s because a ‘challenge’ best describes the experience that we’re looking to create. We want to challenge players by introducing a unique scenario that gets them thinking about robot building in a way that no previous challenge has. So with Saw Log, the first step was answering “How do we want to challenge players this time?”
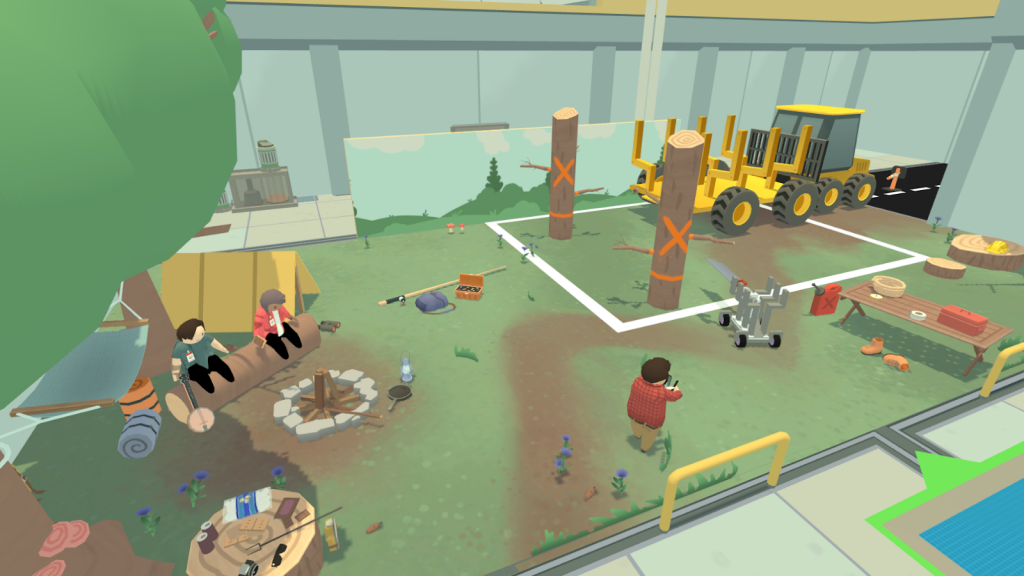
During its ideation, there were already a few playable challenges, including the sandwich delivery that we all know very well by now. So it was valuable to identify the existing interactions already used in challenges, such as carrying and delivering an object to humans. From there, ideas were bounced around until the team landed on one that really stood out. The actual brainstorming part of this process is an unpredictable journey that could fill its own blog post, so rather than going through the whole thought process that led to sawing logs, I’ll describe why this idea stood out as the one to spend our time on.
The act of sawing requires a motion both powerful, but also repeatable in quick succession. Creating a robot to successfully do this would be very different than performing one specific and delicate task (like delivering a sandwich). Additionally, we didn’t even have pistons developed at this stage! So this interaction would not only require the player, but also the robo-team to begin to think differently in regards to robot building.
Step 2 – Rulescripting
The only way to test if ‘sawing logs’ is fun, was to hop into Unity and get that interaction functioning in-game. I prototype using RuleScript, our flexible scripting tool that allows designers to set up various interactions for a robot to encounter. It uses custom components that objects can utilize to trigger events in real time (If you’d like to learn more about RuleScript, check out this blog post).
For sawing a log, a ‘trigger’ object is placed in the divet where the saw should cut through. I’m able to use a filter that makes the trigger only recognize objects tagged ‘saw’, as well as filters for ‘speed’ and ‘direction’. Speed requires the object to enter the divet fast enough, and direction requires it to enter sideways, with the blade facing the log. Finally, a RuleScript timer is used to countdown whenever all the trigger’s filters are met. If this timer is set to a value of a few seconds, it will require a saw to enter the trigger multiple times at the specified speed and direction to drain the timer. So in other words, by quickly moving a saw back and forth through the divet, I can then trigger an event when the timer reaches zero. And that event is breaking the link between the halves that make up the log.
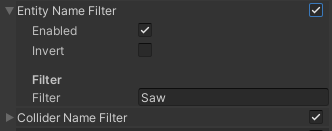
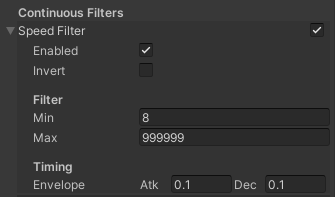
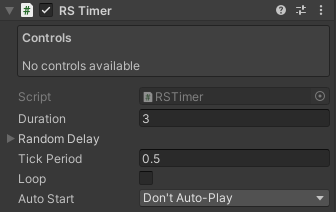
After the initial rulescripting is done, the objects are placed in a scene in which the team can build robots and run some experiments. As you can see with the first iteration, the layout of the scene doesn’t get much thought since the goal at this step is to see if the interaction itself is fun.
Step 3 – Iterating with Objectives and Layout
Once the team confirmed that creating sawing robots was fun, it became my job to craft a full challenge around this interaction. This is the step where many iterations take place, so it’s important to continually put the challenge in front of others on the Robo-team to get feedback.
With Saw Log, I needed a setting that revolved around the sawing interaction. One that would allow room for additional ‘sub-objectives’ to keep the player thinking about unique robot builds. After spending hours watching a random assortment of logging videos, I knew the direction I wanted to start iterating in. I rotated the logs 90o and added some extra weight to the top half, so I could start playing with the idea of cutting down trees. Making this switch was helpful for me to start thinking about what the three sub-objectives in this challenge could be. I experimented with many possibilities including cutting the trees in a certain order so they knock each other into a truck bed.
Testing out a variety of objectives that could fit a challenge is how our team best identifies ways that a challenge can move closer to a more enjoyable state. The team appreciated this iteration of Saw Log for shifting towards cutting down trees, but thought cutting down trees in a certain order wasn’t as fun, especially since the level was starting to feel cramped. I took these thoughts back to the level, and began experimenting with different ways to use space. This resulted in extending the main scene outside our usual size, that you would see in a challenge like Sandwich Delivery. Trying new things with the layout was also beneficial, as this is where I started to define the setting as more of a lively outdoors scene (I’m no artist, so thank you to Unity’s basic 3D shapes)!
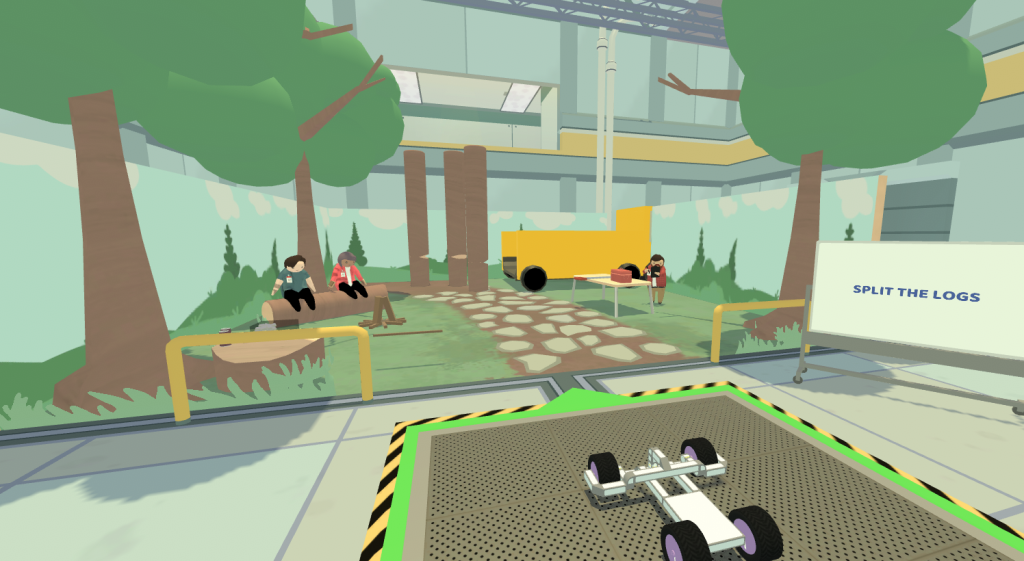
I also wanted the tree cutting experience to feel like the player had more control, so I hopped back into RuleScript. I won’t dive into an intensive level of detail, but I essentially duplicated the same sawing logic in an octagon around the tree to give the player eight directions they could cut into. After that, some “physics magic,” as I’ll call it, was added to make the tree fall in the direction the player intends once the breaking event is called. The team had much more fun with this iteration and it led me towards more interesting sub-objectives, such as trimming off branches, and using a hefty robot to catch the tree so that it can be hauled into the truck.
Step 4 – Art
Eventually the team pried the challenge from my grip, so that an artist could make Saw Log look like a dazzling outdoors scene, rather than “Lets see how many Unity cubes Alan throws in a level.” This handoff is where a 2D artist brings the setting alive with concept pieces. While there were certain areas, such as the campfire, already blocked out in Saw Log, our 2D artist was able to make those areas look more believable with the addition of exciting new props!
And to build off that excitement, the concept pieces are then handed off to a 3D artist, who further brings those props to life by making them objects that actually exist in-level! Each prop gets created in Maya and uses vertex coloring based on how many colors it needs to show. The artist then takes those assets into Unity to create prefabs out of them that can be used in-game. This involves setting up the components that need to make up the object, which can include colliders, destructible pieces, or even physics joints which cause a flower to get pushed down when you drive over it (If you’d like to learn more about 3D art in RoboCo, check out this blog post)!
Step 5 – Final Iterations and Polish
Once the challenge is handed back to design, any number of iterations can still take place. For example, I completely reworked how the tree gets cut down since its 3D asset used breakable pieces. It’s important to note though that after the art assets have been added, most of the challenge design efforts are focused on ensuring all props are hooked up correctly and the challenge is overall in a polished state that can be put in front of players!
While I could (and would love to) write more about all that goes into creating a RoboCo challenge, I believe it’s time for me to cut this post off and get back to, well… working on challenges. I hope this was an enjoyable dive into the Challenge Design process, and absolutely can’t wait for you all to play Saw Log, as well as some other new challenges on the way! Until next time.
Note: this article originally appeared on the RoboCo Dev Blog.